Producing music can seem like a daunting task, especially if you’re new to the world of digital audio workstations (DAWs), synthesizers, and mixing. At AMP Music Lab, we believe that anyone with a passion for music can learn to produce their own tracks. Here’s a step-by-step guide to help you get started on your music production journey.

Step 1: Set Up Your Home Studio
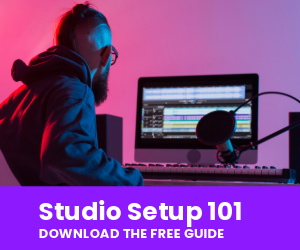
Before you dive into producing music, you’ll need to set up a basic home studio. Here’s what you’ll need:
- Computer: A reliable computer is essential. Whether you choose a PC or Mac, ensure it has enough processing power and memory to run a DAW smoothly.
- DAW (Digital Audio Workstation): This is the software where you’ll record, edit, and mix your music. Popular DAWs include Ableton Live, FL Studio, Logic Pro X, and Pro Tools.
- Audio Interface: This hardware allows you to connect instruments and microphones to your computer. It converts analog signals into digital audio.
- MIDI Controller: A keyboard or pad controller can help you input notes and control virtual instruments within your DAW.
- Headphones and Monitors: Invest in a good pair of studio headphones and monitor speakers to accurately hear your mix.
- Microphone: If you plan to record vocals or acoustic instruments, a quality microphone is necessary.
Step 2: Learn Your DAW
Once your studio is set up, spend some time learning your DAW. Most DAWs have similar features, but their workflows can be different. Start with these basics:
- Navigating the Interface: Get comfortable with the layout, menus, and key functions.
- Recording: Learn how to record audio and MIDI tracks.
- Editing: Practice cutting, copying, pasting, and moving sections of your tracks.
- Mixing: Explore the mixing console, insert effects, and adjust levels.

Step 3: Start with a Simple Beat
Creating a basic beat is a great way to get your feet wet in music production. Here’s how:
- Choose a Drum Kit: Most DAWs come with built-in drum kits. Choose one that fits the genre you want to produce.
- Lay Down a Basic Kick and Snare Pattern: Start with a simple 4/4 beat with a kick drum on beats 1 and 3, and a snare on beats 2 and 4.
- Add Hi-Hats and Percussion: Add hi-hats on the off-beats and other percussion elements to fill out the rhythm.
Step 4: Create a Melody and Harmony
Once you have a beat, it’s time to add musical elements:
- Choose an Instrument: Select a virtual instrument from your DAW’s library or use a plugin.
- Create a Chord Progression: Start with a simple chord progression in a key that you’re comfortable with.
- Add a Melody: Write a melody that complements your chord progression. You can use a MIDI controller to input notes or draw them in using your DAW’s piano roll.

Step 5: Arrange Your Track
Arrange the different sections of your track to create a full song. Common sections include:
- Intro: The beginning of the track, often with fewer elements.
- Verse: The main section where lyrics are typically sung.
- Chorus: The most energetic and memorable part of the song.
- Bridge: A contrasting section that adds variety.
- Outro: The ending of the track, which may fade out or have a definitive ending.

Step 6: Mix Your Track
Mixing is the process of balancing all the elements in your track to make it sound cohesive. Here are some basic mixing tips:
Volume Levels: Adjust the volume of each track so that everything can be heard clearly.
Panning: Place instruments in the stereo field to create a sense of space.
EQ: Use equalization to cut unwanted frequencies and enhance important ones.
Compression: Apply compression to control the dynamics of your tracks.
Reverb and Delay: Add reverb and delay to give your track a sense of depth and space.
Step 7: Master Your Track
Mastering is the final step in the music production process. It involves making subtle adjustments to ensure your track sounds good on all playback systems. While professional mastering is recommended, here are some basic steps:
- Final EQ: Make small adjustments to the overall frequency balance.
- Compression and Limiting: Apply compression and limiting to increase the perceived loudness of your track.
- Stereo Enhancement: Enhance the stereo width if needed.
Step 8: Share Your Music
Once your track is complete, it’s time to share it with the world. You can upload your music to streaming platforms like Spotify, SoundCloud, and Apple Music, or share it on social media.

Join AMP Music Lab
If you’re looking for more in-depth guidance and personalized instruction, consider enrolling in our music production training program at AMP Music Lab. We offer flexible scheduling, 1-on-1 lessons, and recorded lab sessions for on-demand review. Plus, you’ll get hands-on experience with industry-standard tools and techniques.
Ready to start your music production journey? Enroll in our music production training program today and take your music to the next level!
For more information, visit our website or contact us directly.